PyBullet 사용법에 대해서 알아보자.
PyBullet에 대해서 간단히 소개하자면,
다양한 환경에서 여러가지 플랫폼의 로봇을 시뮬레이션 해볼 수 있는 open source용 물리 엔진이다.
API가 잘 되있어서 응용이 편리하고, 용도에 맞게 설정할 수 있어 자유도가 높다.
gym과의 interface도 잘 구성되어 있기 때문에 custom 강화학습용 환경을 만드는데도 매우 훌륭하다.
1. Server-Client Connection
1
import pybullet as p
1
2
pybullet build time: May 20 2022 19:45:31
1
2
# p.connect(p.GUI)
p.connect(p.DIRECT)
1
0
client와 server가 연결하는 방법은 일반적인 방법은 2가지가 있다.
추가적인 방법은 Qickstart Guid를 보면 잘 설명되어 있다.
p.DIRECT를 인자로 넘기면 rendering 없이 빠른 처리를 얻을 수 있다.
p.GUI를 넘기면 말 그대로 GUI rendering을 제공하여 시각화된 결과를 얻을 수 있다.
문제없이 연결이 완료되면 default client id 인 0을 반환한다.
2. How to Load Bodies
환경과 로봇에 대한 모델을 불러와야 하기 때문에 다음과 같은 함수를 호출하여 관련된 path를 불러온다.
Bullet Data files 이곳에 담긴 데이터들을 불러올 수 있다.
1
2
3
import pybullet_data

p.setAdditionalSearchPath(pybullet_data.getDataPath())
robot이나 ground model은 body라고 불리면서 시뮬레이션에 불러올 수 있고
urdf format으로 되어 있다.
어떤 위치에 어느 클라이언트에 셋팅할 지를 정할 수 있고
현 client와 연결된 시뮬레이션 환경에 몇개의 body가 연결되어 있는지도 알 수 있다.
1
2
3
4
5
6
7
8
9
10
11
12
13
14
# First, let's make sure we start with a fresh new simulation.
# Otherwise, we can keep adding objects by running this cell over again.
p.resetSimulation()

# Load our simulation floor plane at the origin (0, 0, 0).
terrain = p.loadURDF('plane.urdf')

# Load an R2D2 droid at the position at 0.5 meters height in the z-axis.
r2d2 = p.loadURDF('r2d2.urdf', [0, 0, 0.5])


# We can check the number of bodies we have in the simulation.
p.getNumBodies()
1
2
3. How to Get Input Data
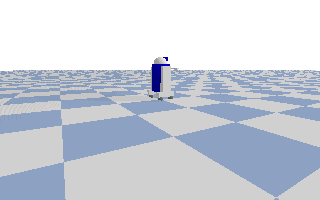
jupyter notebook에 rendering 결과를 보여주기 위한 함수이다.
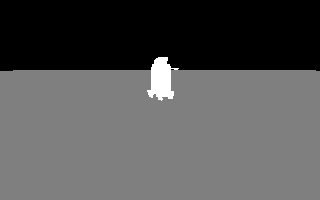
rgba, depth, semantic Mask에 대한 결과를 다음과 같이 camera를 세팅하여 얻어 올 수 있다.
1
2
3
4
5
6
7
8
9
10
11
12
13
14
15
16
17
18
19
20
21
22
23
24
25
26
27
28
29
30
31
32
33
34
35
36
37
38
import numpy as np
from PIL import Image
from IPython.display import display

def show_render(p):
    width = 320
    height = 200
    img_arr = p.getCameraImage(
        width,
        height,
        viewMatrix=p.computeViewMatrixFromYawPitchRoll(
            cameraTargetPosition=[0, 0, 0],
            distance=4,
            yaw=60,
            pitch=-10,
            roll=0,
            upAxisIndex=2,
        ),
        projectionMatrix=p.computeProjectionMatrixFOV(
            fov=60,
            aspect=width/height,
            nearVal=0.01,
            farVal=100,
        ),
        shadow=True,
        lightDirection=[1, 1, 1],
    )

    width, height, rgba, depth, mask = img_arr
    print(f"width : {width}, height: {height}")
    print(f"rgba shape={rgba.shape}, dtype={rgba.dtype}")
    display(Image.fromarray(rgba, 'RGBA'))
    print(f"depth shape={depth.shape}, dtype={depth.dtype}, as values from 0.0 (near) to 1.0 (far)")
    display(Image.fromarray((depth*255).astype('uint8')))
    print(f"mask shape={mask.shape}, dtype={mask.dtype}, as unique values from 0 to N-1 entities, and -1 as None")
    display(Image.fromarray(np.interp(mask, (-1, mask.max()), (0, 255)).astype('uint8')))

show_render(p)
1
2
3
width : 320, height: 200
rgba shape=(200, 320, 4), dtype=uint8
1
2
depth shape=(200, 320), dtype=float32, as values from 0.0 (near) to 1.0 (far)

1
2
mask shape=(200, 320), dtype=int32, as unique values from 0 to N-1 entities, and -1 as None
4. How to get Robot Information
r2d2로봇을 구동하기 위해서 필요한 joint들의 정보를 다음과 같이 얻어올 수 있다.
dataclass 는 모든 인자에 대한 메서드를 초기화하고 출력할 수 있도록
init 과 repr 가 정의되어 있는 decorator 이다. 그것을 활용해보자.
1
2
3
4
5
6
7
8
9
10
11
12
13
14
15
16
17
18
19
20
21
22
23
24
25
26
27
28
29
30
31
32
# First let's define a class for the JointInfo.
from dataclasses import dataclass

@dataclass
class Joint:
    index: int
    name: str
    type: int
    gIndex: int
    uIndex: int
    flags: int
    damping: float
    friction: float
    lowerLimit: float
    upperLimit: float
    maxForce: float
    maxVelocity: float
    linkName: str
    axis: tuple
    parentFramePosition: tuple
    parentFrameOrientation: tuple
    parentIndex: int

    def __post_init__(self):
        self.name = str(self.name, 'utf-8')
        self.linkName = str(self.linkName, 'utf-8')

# Let's analyze the R2D2 droid!
print(f"r2d2 unique ID: {r2d2}")
for i in range(p.getNumJoints(r2d2)):
    joint = Joint(*p.getJointInfo(r2d2, i))
    print('\t', joint)
1
2
3
4
5
6
7
8
9
10
11
12
13
14
15
16
17
r2d2 unique ID: 1
	 Joint(index=0, name='base_to_right_leg', type=4, gIndex=-1, uIndex=-1, flags=0, damping=0.0, friction=0.0, lowerLimit=0.0, upperLimit=-1.0, maxForce=0.0, maxVelocity=0.0, linkName='right_leg', axis=(0.0, 0.0, 0.0), parentFramePosition=(0.22, 0.0, 0.25), parentFrameOrientation=(0.0, -0.7070904020014416, 0.0, 0.7071231599922604), parentIndex=-1)
	 Joint(index=1, name='right_base_joint', type=4, gIndex=-1, uIndex=-1, flags=0, damping=0.0, friction=0.0, lowerLimit=0.0, upperLimit=-1.0, maxForce=0.0, maxVelocity=0.0, linkName='right_base', axis=(0.0, 0.0, 0.0), parentFramePosition=(0.2999999996780742, 0.0, -1.3898038463944216e-05), parentFrameOrientation=(0.0, 0.7070904020014416, 0.0, 0.7071231599922604), parentIndex=0)
	 Joint(index=2, name='right_front_wheel_joint', type=0, gIndex=7, uIndex=6, flags=1, damping=0.0, friction=0.0, lowerLimit=0.0, upperLimit=-1.0, maxForce=100.0, maxVelocity=100.0, linkName='right_front_wheel', axis=(0.0, 0.0, 1.0), parentFramePosition=(0.0, 0.133333333333, -0.085), parentFrameOrientation=(0.0, -0.7070904020014416, 0.0, 0.7071231599922604), parentIndex=1)
	 Joint(index=3, name='right_back_wheel_joint', type=0, gIndex=8, uIndex=7, flags=1, damping=0.0, friction=0.0, lowerLimit=0.0, upperLimit=-1.0, maxForce=100.0, maxVelocity=100.0, linkName='right_back_wheel', axis=(0.0, 0.0, 1.0), parentFramePosition=(0.0, -0.133333333333, -0.085), parentFrameOrientation=(0.0, -0.7070904020014416, 0.0, 0.7071231599922604), parentIndex=1)
	 Joint(index=4, name='base_to_left_leg', type=4, gIndex=-1, uIndex=-1, flags=0, damping=0.0, friction=0.0, lowerLimit=0.0, upperLimit=-1.0, maxForce=0.0, maxVelocity=0.0, linkName='left_leg', axis=(0.0, 0.0, 0.0), parentFramePosition=(-0.22, 0.0, 0.25), parentFrameOrientation=(0.0, -0.7070904020014416, 0.0, 0.7071231599922604), parentIndex=-1)
	 Joint(index=5, name='left_base_joint', type=4, gIndex=-1, uIndex=-1, flags=0, damping=0.0, friction=0.0, lowerLimit=0.0, upperLimit=-1.0, maxForce=0.0, maxVelocity=0.0, linkName='left_base', axis=(0.0, 0.0, 0.0), parentFramePosition=(0.2999999996780742, 0.0, -1.3898038463944216e-05), parentFrameOrientation=(0.0, 0.7070904020014416, 0.0, 0.7071231599922604), parentIndex=4)
	 Joint(index=6, name='left_front_wheel_joint', type=0, gIndex=9, uIndex=8, flags=1, damping=0.0, friction=0.0, lowerLimit=0.0, upperLimit=-1.0, maxForce=100.0, maxVelocity=100.0, linkName='left_front_wheel', axis=(0.0, 0.0, 1.0), parentFramePosition=(0.0, 0.133333333333, -0.085), parentFrameOrientation=(0.0, -0.7070904020014416, 0.0, 0.7071231599922604), parentIndex=5)
	 Joint(index=7, name='left_back_wheel_joint', type=0, gIndex=10, uIndex=9, flags=1, damping=0.0, friction=0.0, lowerLimit=0.0, upperLimit=-1.0, maxForce=100.0, maxVelocity=100.0, linkName='left_back_wheel', axis=(0.0, 0.0, 1.0), parentFramePosition=(0.0, -0.133333333333, -0.085), parentFrameOrientation=(0.0, -0.7070904020014416, 0.0, 0.7071231599922604), parentIndex=5)
	 Joint(index=8, name='gripper_extension', type=1, gIndex=11, uIndex=10, flags=1, damping=0.0, friction=0.0, lowerLimit=-0.38, upperLimit=0.0, maxForce=1000.0, maxVelocity=0.5, linkName='gripper_pole', axis=(1.0, 0.0, 0.0), parentFramePosition=(0.0, 0.19, 0.2), parentFrameOrientation=(0.0, 0.0, -0.7070904020014416, 0.7071231599922604), parentIndex=-1)
	 Joint(index=9, name='left_gripper_joint', type=0, gIndex=12, uIndex=11, flags=1, damping=0.0, friction=0.0, lowerLimit=0.0, upperLimit=0.548, maxForce=1000.0, maxVelocity=0.5, linkName='left_gripper', axis=(0.0, 0.0, 1.0), parentFramePosition=(0.2, 0.02, 0.0), parentFrameOrientation=(0.0, 0.0, 0.0, 1.0), parentIndex=8)
	 Joint(index=10, name='left_tip_joint', type=4, gIndex=-1, uIndex=-1, flags=0, damping=0.0, friction=0.0, lowerLimit=0.0, upperLimit=-1.0, maxForce=0.0, maxVelocity=0.0, linkName='left_tip', axis=(0.0, 0.0, 0.0), parentFramePosition=(0.0, 0.0, 0.0), parentFrameOrientation=(0.0, 0.0, 0.0, 1.0), parentIndex=9)
	 Joint(index=11, name='right_gripper_joint', type=0, gIndex=13, uIndex=12, flags=1, damping=0.0, friction=0.0, lowerLimit=0.0, upperLimit=0.548, maxForce=1000.0, maxVelocity=0.5, linkName='right_gripper', axis=(0.0, 0.0, -1.0), parentFramePosition=(0.2, -0.02, 0.0), parentFrameOrientation=(0.0, 0.0, 0.0, 1.0), parentIndex=8)
	 Joint(index=12, name='right_tip_joint', type=4, gIndex=-1, uIndex=-1, flags=0, damping=0.0, friction=0.0, lowerLimit=0.0, upperLimit=-1.0, maxForce=0.0, maxVelocity=0.0, linkName='right_tip', axis=(0.0, 0.0, 0.0), parentFramePosition=(0.0, 0.0, 0.0), parentFrameOrientation=(0.0, 0.0, 0.0, 1.0), parentIndex=11)
	 Joint(index=13, name='head_swivel', type=0, gIndex=14, uIndex=13, flags=1, damping=0.0, friction=0.0, lowerLimit=-0.38, upperLimit=0.0, maxForce=1000.0, maxVelocity=0.5, linkName='head', axis=(0.0, 0.0, 1.0), parentFramePosition=(0.0, 0.0, 0.3), parentFrameOrientation=(0.0, 0.0, 0.0, 1.0), parentIndex=-1)
	 Joint(index=14, name='tobox', type=4, gIndex=-1, uIndex=-1, flags=0, damping=0.0, friction=0.0, lowerLimit=0.0, upperLimit=-1.0, maxForce=0.0, maxVelocity=0.0, linkName='box', axis=(0.0, 0.0, 0.0), parentFramePosition=(0.0, 0.1214, 0.1214), parentFrameOrientation=(0.0, 0.0, 0.0, 1.0), parentIndex=13)
5. How to Set Customized Terrain
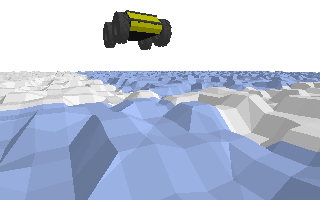
ground도 customize해서 설정할 수 있고
로봇의 모델을 바꿀 수도 있다.
Uneven Terrain을 갖는 height feild와
UGV에 해당되는 husky모델을 불러와 보자.
1
2
3
4
5
6
7
8
9
10
11
12
13
14
15
16
17
18
19
20
21
22
23
24
25
26
27
28
29
30
31
32
33
import random
def set_height_field(p):
    random.seed(10)
    heightPerturbationRange = 0.5 # 0.05
    numHeightfieldRows = 256
    numHeightfieldColumns = 256
    heightfieldData = [0]*numHeightfieldRows*numHeightfieldColumns
    for j in range (int(numHeightfieldColumns/2)):
        for i in range (int(numHeightfieldRows/2) ):
            height = random.uniform(0,heightPerturbationRange)
            heightfieldData[2*i+2*j*numHeightfieldRows]=height
            heightfieldData[2*i+1+2*j*numHeightfieldRows]=height
            heightfieldData[2*i+(2*j+1)*numHeightfieldRows]=height
            heightfieldData[2*i+1+(2*j+1)*numHeightfieldRows]=height

    terrainShape = p.createCollisionShape(shapeType = p.GEOM_HEIGHTFIELD,
                                          meshScale=[0.3,0.3,1],  # [.05,.05,1],
                                          heightfieldTextureScaling=(numHeightfieldRows-1)/2,
                                          heightfieldData=heightfieldData,
                                          numHeightfieldRows=numHeightfieldRows,
                                          numHeightfieldColumns=numHeightfieldColumns)
    terrain  = p.createMultiBody(0, terrainShape)
    p.resetBasePositionAndOrientation(terrain,[0,0,0], [0,0,0,1])
    return terrain

p.resetSimulation()
terrain = set_height_field(p)
husky = p.loadURDF('husky/husky.urdf', [1, -1, 1.0]) # , [0, 0, 0.5])

print(f"husky unique ID: {husky}")
for i in range(p.getNumJoints(husky)):
    joint = Joint(*p.getJointInfo(husky, i))
    print('\t', joint)
1
2
3
4
5
6
7
8
9
10
11
12
husky unique ID: 1
	 Joint(index=0, name='chassis_joint', type=4, gIndex=-1, uIndex=-1, flags=0, damping=0.0, friction=0.0, lowerLimit=0.0, upperLimit=-1.0, maxForce=0.0, maxVelocity=0.0, linkName='base_link', axis=(0.0, 0.0, 0.0), parentFramePosition=(0.0, 0.0, 0.14493), parentFrameOrientation=(0.0, 0.0, 0.0, 1.0), parentIndex=-1)
	 Joint(index=1, name='imu_joint', type=4, gIndex=-1, uIndex=-1, flags=0, damping=0.0, friction=0.0, lowerLimit=0.0, upperLimit=-1.0, maxForce=0.0, maxVelocity=0.0, linkName='imu_link', axis=(0.0, 0.0, 0.0), parentFramePosition=(0.08748, 0.00085, 0.09053), parentFrameOrientation=(0.0, 0.0, 0.0, 1.0), parentIndex=0)
	 Joint(index=2, name='front_left_wheel', type=0, gIndex=7, uIndex=6, flags=1, damping=0.0, friction=0.0, lowerLimit=0.0, upperLimit=-1.0, maxForce=0.0, maxVelocity=0.0, linkName='front_left_wheel_link', axis=(0.0, 1.0, 0.0), parentFramePosition=(0.34348, 0.28625, -0.06665), parentFrameOrientation=(0.0, 0.0, 0.0, 1.0), parentIndex=0)
	 Joint(index=3, name='front_right_wheel', type=0, gIndex=8, uIndex=7, flags=1, damping=0.0, friction=0.0, lowerLimit=0.0, upperLimit=-1.0, maxForce=0.0, maxVelocity=0.0, linkName='front_right_wheel_link', axis=(0.0, 1.0, 0.0), parentFramePosition=(0.34348, -0.28454999999999997, -0.06665), parentFrameOrientation=(0.0, 0.0, 0.0, 1.0), parentIndex=0)
	 Joint(index=4, name='rear_left_wheel', type=0, gIndex=9, uIndex=8, flags=1, damping=0.0, friction=0.0, lowerLimit=0.0, upperLimit=-1.0, maxForce=0.0, maxVelocity=0.0, linkName='rear_left_wheel_link', axis=(0.0, 1.0, 0.0), parentFramePosition=(-0.16852, 0.28625, -0.06665), parentFrameOrientation=(0.0, 0.0, 0.0, 1.0), parentIndex=0)
	 Joint(index=5, name='rear_right_wheel', type=0, gIndex=10, uIndex=9, flags=1, damping=0.0, friction=0.0, lowerLimit=0.0, upperLimit=-1.0, maxForce=0.0, maxVelocity=0.0, linkName='rear_right_wheel_link', axis=(0.0, 1.0, 0.0), parentFramePosition=(-0.16852, -0.28454999999999997, -0.06665), parentFrameOrientation=(0.0, 0.0, 0.0, 1.0), parentIndex=0)
	 Joint(index=6, name='top_plate', type=4, gIndex=-1, uIndex=-1, flags=0, damping=0.0, friction=0.0, lowerLimit=0.0, upperLimit=-1.0, maxForce=0.0, maxVelocity=0.0, linkName='top_plate_link', axis=(0.0, 0.0, 0.0), parentFramePosition=(0.08748, 0.00085, -0.09947), parentFrameOrientation=(0.0, 0.0, 0.0, 1.0), parentIndex=0)
	 Joint(index=7, name='user_rail', type=4, gIndex=-1, uIndex=-1, flags=0, damping=0.0, friction=0.0, lowerLimit=0.0, upperLimit=-1.0, maxForce=0.0, maxVelocity=0.0, linkName='user_rail_link', axis=(0.0, 0.0, 0.0), parentFramePosition=(0.35948, 0.00085, 0.14553), parentFrameOrientation=(0.0, 0.0, 0.0, 1.0), parentIndex=0)
	 Joint(index=8, name='front_bumper', type=4, gIndex=-1, uIndex=-1, flags=0, damping=0.0, friction=0.0, lowerLimit=0.0, upperLimit=-1.0, maxForce=0.0, maxVelocity=0.0, linkName='front_bumper_link', axis=(0.0, 0.0, 0.0), parentFramePosition=(0.56748, 0.00085, -0.008470000000000005), parentFrameOrientation=(0.0, 0.0, 0.0, 1.0), parentIndex=0)
	 Joint(index=9, name='rear_bumper', type=4, gIndex=-1, uIndex=-1, flags=0, damping=0.0, friction=0.0, lowerLimit=0.0, upperLimit=-1.0, maxForce=0.0, maxVelocity=0.0, linkName='rear_bumper_link', axis=(0.0, 0.0, 0.0), parentFramePosition=(-0.39252, 0.00085, -0.008470000000000005), parentFrameOrientation=(0.0, 0.0, 0.9999999999991198, -1.3267948966775328e-06), parentIndex=0)
1
show_render(p)
1
2
3
width : 320, height: 200
rgba shape=(200, 320, 4), dtype=uint8
1
2
depth shape=(200, 320), dtype=float32, as values from 0.0 (near) to 1.0 (far)

1
2
mask shape=(200, 320), dtype=int32, as unique values from 0 to N-1 entities, and -1 as None

6. How to Set Gravity
헌데 보면 차가 공중에 떠있다.
r2d2로봇의 경우 Center Of Gravity (COG)가 0.5m 위에 있지만
husky는 그렇지 않기 때문이다.
로봇을 위치를 z= 0 이되도록 옮기거나 중력을 설정하면 된다.
중력을 설정하고 로봇이 어떻게 움직이는지 보자.
1
2
3
4
5
6
7
8
9
10
11
12
13
14
15
16
17
18
19
20
21
22
23
24
25
26
27
28
29
30
31
32
33
34
35
36
37
38
39
40
41
42
import imageio

# Set the gravity to Earth's gravity.
fps = 20
gravity = -9.807
p.setGravity(0, 0, gravity)
p.setTimeStep(1 / fps)

cam_width = 320
cam_height = 200

# Run the simulation for a fixed amount of steps.
images = []
for i in range(20):
    position, orientation = p.getBasePositionAndOrientation(husky)
    x, y, z = position
    roll, pitch, yaw = p.getEulerFromQuaternion(orientation)
    print(f"{i:3}: x={x:0.10f}, y={y:0.10f}, z={z:0.10f}), roll={roll:0.10f}, pitch={pitch:0.10f}, yaw={yaw:0.10f}")
    cam_view_matrix = p.computeViewMatrixFromYawPitchRoll(cameraTargetPosition=[0, 0, 0],
                                                          distance=4,
                                                          yaw=60,
                                                          pitch=-10,
                                                          roll=0,
                                                          upAxisIndex=2,
                                                         )
    cam_projection_matrix = p.computeProjectionMatrixFOV(fov=60,
                                                         aspect=cam_width/cam_height,
                                                         nearVal=0.01,
                                                         farVal=100,
                                                        )
    img = p.getCameraImage(cam_width, cam_height, cam_view_matrix, cam_projection_matrix)[2]
    images.append(img)

    p.stepSimulation()

imageio.mimsave('husky_falling.gif', images)

# show_render(p)

from IPython.display import Image as display_image

display_image('husky_falling.gif')
1
2
3
4
5
6
7
8
9
10
11
12
13
14
15
16
17
18
19
20
21
  0: x=1.0000000000, y=-1.0000000000, z=1.0000000000), roll=0.0000000000, pitch=-0.0000000000, yaw=0.0000000000
  1: x=1.0000000000, y=-1.0000000000, z=0.9754825000), roll=-0.0000000000, pitch=0.0000000000, yaw=0.0000000000
  2: x=1.0000000000, y=-1.0000000000, z=0.9265205793), roll=-0.0000000000, pitch=0.0000000000, yaw=0.0000000000
  3: x=1.0000000000, y=-1.0000000000, z=0.8532349732), roll=-0.0000000000, pitch=0.0000000000, yaw=0.0000000000
  4: x=1.0000000000, y=-1.0000000000, z=0.7557932696), roll=-0.0000000000, pitch=0.0000000000, yaw=0.0000000000
  5: x=1.0000000000, y=-1.0000000000, z=0.6344087447), roll=-0.0000000000, pitch=0.0000000000, yaw=0.0000000000
  6: x=1.0000000000, y=-1.0000000000, z=0.4893388571), roll=-0.0000000000, pitch=0.0000000000, yaw=0.0000000000
  7: x=1.0000000000, y=-1.0000000000, z=0.3208834200), roll=-0.0000000000, pitch=0.0000000000, yaw=0.0000000000
  8: x=1.0000000000, y=-1.0000000000, z=0.1293824832), roll=-0.0000000000, pitch=0.0000000000, yaw=0.0000000000
  9: x=1.0110932110, y=-0.9891509801, z=0.1321506251), roll=0.0006308830, pitch=-0.0003285125, yaw=-0.0486756768
 10: x=1.0231584604, y=-0.9790928004, z=0.1494433999), roll=-0.0168233515, pitch=-0.0115365024, yaw=-0.0879384229
 11: x=1.0347566403, y=-0.9715847847, z=0.1577502105), roll=-0.0442984255, pitch=-0.0225694514, yaw=-0.1257284837
 12: x=1.0441179675, y=-0.9657316567, z=0.1571676148), roll=-0.0784225725, pitch=-0.0241735412, yaw=-0.1577819432
 13: x=1.0515769233, y=-0.9613052055, z=0.1525780425), roll=-0.1175661333, pitch=-0.0154108548, yaw=-0.1859225125
 14: x=1.0581924079, y=-0.9564833564, z=0.1468545112), roll=-0.1560738071, pitch=-0.0025725752, yaw=-0.2131697551
 15: x=1.0647853658, y=-0.9508700861, z=0.1406801442), roll=-0.1946624320, pitch=0.0120081085, yaw=-0.2396239364
 16: x=1.0711680888, y=-0.9462305934, z=0.1389841200), roll=-0.2089362537, pitch=0.0166377268, yaw=-0.2513576113
 17: x=1.0735334429, y=-0.9452467284, z=0.1390465223), roll=-0.2126924223, pitch=0.0175227322, yaw=-0.2552238744
 18: x=1.0735022071, y=-0.9452188232, z=0.1389019501), roll=-0.2120871931, pitch=0.0176985171, yaw=-0.2555059454
 19: x=1.0734620350, y=-0.9452093575, z=0.1388371824), roll=-0.2116432454, pitch=0.0174927155, yaw=-0.2557765504
1
<IPython.core.display.Image object>
default fps가 240hz 로 굉장이 빨라서 setTimeStep 함수를 사용하여 20hz로 설정하고 이동 경과를 출력했다.
현재 로봇의 위치는 다음과 같이 설정 되었다.

7. How to set Camera
camera에 대한 default setting은 다음과 같다. [width, height, viewMatrix, projectionMatrix, cameraUp, cameraForward, horizontal, vertical, yaw, pitch, dist, target]
1
print(p.getDebugVisualizerCamera())
1
2
(1024, 768, (0.642787516117096, -0.4393851161003113, 0.6275069713592529, 0.0, 0.766044557094574, 0.36868777871131897, -0.5265407562255859, 0.0, -0.0, 0.8191521167755127, 0.5735764503479004, 0.0, 2.384185791015625e-07, 2.384185791015625e-07, -5.000000476837158, 1.0), (0.7499999403953552, 0.0, 0.0, 0.0, 0.0, 1.0, 0.0, 0.0, 0.0, 0.0, -1.0000200271606445, -1.0, 0.0, 0.0, -0.02000020071864128, 0.0), (0.0, 0.0, 1.0), (-0.6275069713592529, 0.5265407562255859, -0.5735764503479004), (17141.001953125, 20427.853515625, -0.0), (-8787.701171875, 7373.75537109375, 16383.041015625), 50.0, -35.0, 5.0, (0.0, 0.0, 0.0))
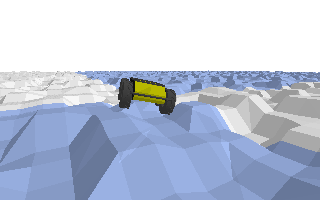
다음과 같은 방법으로 카메라의 위치를 바꾸어 볼 수도 있으며
매 스텝 로봇의 바디를 따라다니게 할 수도 있다.
1
p.resetDebugVisualizerCamera(4, 50, -35, [0,0,0])
8. How to Set Local Frame
1
2
3
4
5
6
7
8
9
10
11
12
13
14
15
def set_local_frame(p, robot):
#     start, orient = p.getBasePositionAndOrientation(robot)
    start, orient, *_ = p.getLinkState(robot, 1) # 1 is base frame of imu
    rot_mat = np.array(p.getMatrixFromQuaternion(orient)).reshape(3,3)
    colors = np.eye(3)
    ends = start + rot_mat.T@colors
    for i, end in enumerate(ends):
        p.addUserDebugLine(start,
                           end,
                           colors[i],
                           lineWidth=2.0,
                           parentObjectUniqueId=husky)

set_local_frame(p, husky)
show_render(p)
1
2
3
width : 320, height: 200
rgba shape=(200, 320, 4), dtype=uint8
1
2
depth shape=(200, 320), dtype=float32, as values from 0.0 (near) to 1.0 (far)

1
2
mask shape=(200, 320), dtype=int32, as unique values from 0 to N-1 entities, and -1 as None

1
p.disconnect()

Leave a comment